Good morning everyone!
Apparently, my writer’s block has gone on longer than anticipated. The update really is “The rabbits are all thriving, no new litters expected until 7/21 at the earliest.” So I’ve been struggling to write much in regards to that. One litter is weaned and doing very well, the other batch of kits recently turned 4 weeks and will hopefully be weaned in about 2 more.
So that said, I’ll instead post on a topic I’ve now had the pleasure of starting to learn – tattooing rabbits. I use a brand called “Stone”, and as you can see from the photo it is a pressure type. Personally I handle the vast majority of rabbit operations by myself (except nail trimming), and in my current opinion – I can’t see trying to use a free-hand tattooer by myself. Two of my rabbits have free-hand tattoos, and the advantage of those is they look just like sharpie marker. You’ll see the difference below.


This is what a free-hand tattoo looks like vs. the “stamping” kit I have.
So, onto the tattooing. I’ll say outright, it’s currently my least favorite tasks. It hurts them a little, and it takes them by surprise. However, in the world of rabbits, provable pedigrees and good record keeping are king – and realistically, there is no other good way to mark them and tell them apart. (Especially on an all-white bun who, for all intensive purposes, looks just like its siblings). If you plan to use them all for meat, then there’s definitely no reason to tattoo them. However, if there’s a chance you’ll sell – and especially if you plan to mix with another litter – it’s a good idea. I recommend tattooing them, if you can, from around 6 – 8 weeks of age. They’re easier to handle, and their ears are just about the right size to fit the tattoo comfortably and easily.
You want to tattoo the rabbit’s left ear (if you were the rabbit). If you’re facing the rabbit head-on, it’ll be the one on the right. If you ever get into showing, the “official” number from registration or a Grand Champion will go in the right ear – so leave that one clear. You’ll need an alcohol wipe or some kind of sanitizer, a towel, a heavy piece of fabric (I find an old rug works perfectly), your tattoo kit and ink.

My tattooing supplies.
The goal is not just to get the rabbit marked – it’s to make sure that both you and the rabbit are safe during the quick procedure. Set up the numbers you want in advance – each rabbit should have a different tattoo. As I select a rabbit, I look it over first for all of the signs of good health. Make sure the teeth are proper (no wolf teeth, etc.), there’s nothing going on with the nose, and no other issues. Plus, I’ll check the sex to record with the tattoo number for my records. Once everything is set, I get the rabbit set up.


I make a “Rabbit Burrito” with the towel. Make sure it’s long enough that it’s wrapped around the bun in such a way so that the rabbit’s weight is resting on both ends. This way, if the rabbit tries to jump, it’s weight will help hold it in place. Secondly, I wrap the rug around in something of the same procedure. But make sure to wrap the rug around the front of the rabbit – it’s not uncommon for them to try to just sprint forward.
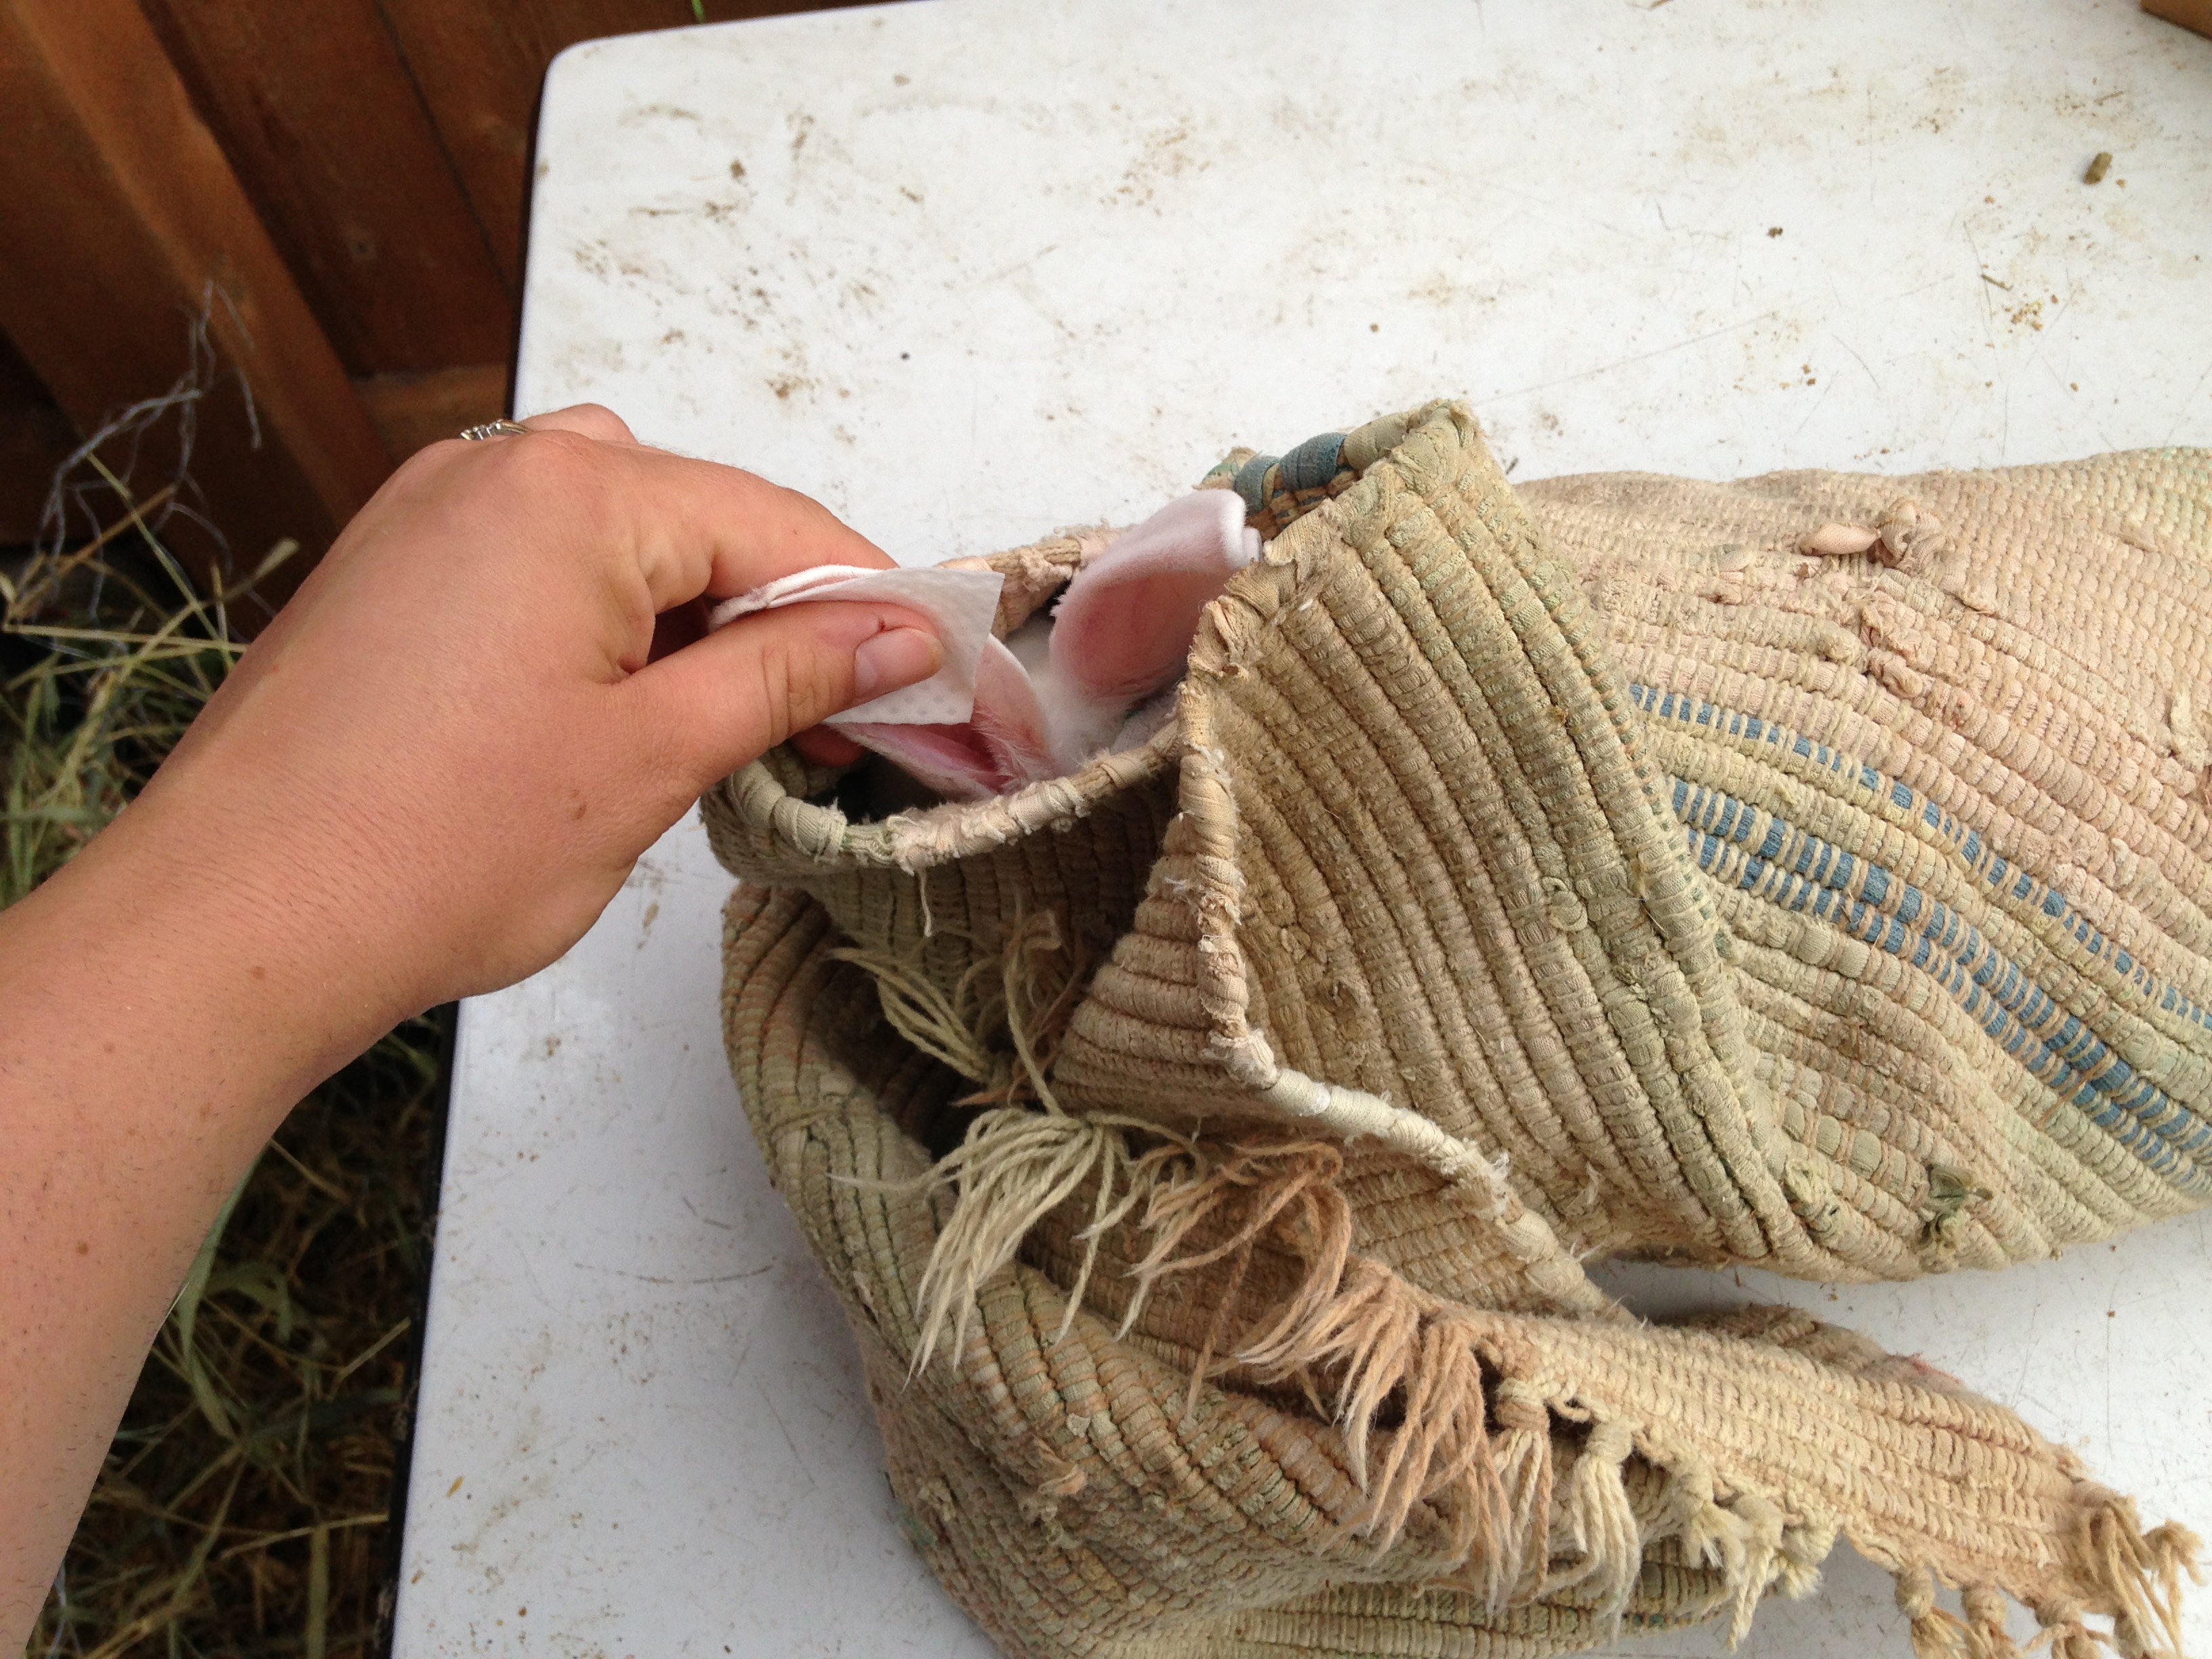
Once the rabbit is set up, I’ll clean the ear (on both sides) with the alcohol wipe. This helps with infection, etc.

I do the tattooing by myself, so this is the demonstration of the holding technique I use. Rabbit in the crook of the arm, firm grip, and if done right – the towel/rug will hold the rabbit for the 1 second it takes to do the tattoo. (It took me awhile to perfect this technique – I’ve had at least 2 rabbits fall off the table from bolting forward. Press the tattooer into a piece of paper first to make certain you have it orientated correctly – then line it up in the rabbit’s ear. This part takes me the longest, but I want to make certain everything is square and that the whole number will end up inside the ear – not on the fur.

Now here’s the REAL trick – you must squeeze hard. (If you squeeze things for a living – adjust accordingly.) But for the rest of us, the kits are designed to not go through the ear. I usually end up pressing hard for about one second, then releasing. As long as you have a good hold on the rabbit, they won’t be able to jump free and hurt themselves – and the indentations must be legible and very well defined when you are done. I took a picture above to show you what it looks like before I put the ink in.

Once you check your work – and you have nice, legible, clean and clear indents in the ear – you roll the ink in. Make sure each well gets filled. I usually fold the ear in two and rub the ink in quickly to make sure it’s in there well. (I only want to do this once to each rabbit) I put the rabbit in a separate hutch to let the ink dry, then I put it back with its siblings. If the rabbit has a hutchmate, they’ll take care of cleaning off the excess ink in no time. Even if the rabbit is by itself, it’ll flake off eventually. Don’t worry about washing it off.

And finally, a picture of “Not squeezing hard enough” vs. “Squeezing hard enough”.
If you do need to tattoo, I hope that this is of help to you. I learned a lot of this the hard way, because the videos I watched didn’t always seem to use a rug or anything to brace the buns. This technique so far has been working very, very well for me. Happy rabbiting!

I learned how to tattoo rabbits on June 1st, with a friend (I was borrowing her tattooer while she was here dropping off some rabbits.) who does it all the time. Only difference is that I was using a pen. I would really honestly rather use the pen than the clamp. It seems to hurt a lot less, and you can feel how well you are getting the needle in there. You also can check your work more easily, since the ink is not all over the ear. I would reccomend trying it.
Reblogged this on Hiccup's Family Rabbitry and commented:
Helpful Tattooing Technique for the future
Hah! Thanks for sharing! I’m aspiring to start my own little rabbitry soon and I was just wondering the other day how you keep track of them.
Thank you so much for your tutorial. It was very helpful to me. I just bought an ear tatoo kit similar to yours. However, it came with no instructions or hints. So I turned to the internet and found you! I was successful at tatooing my rabbits alone after following your advice.